> For the complete documentation index, see [llms.txt](https://docs.verifone.com/llms.txt). Markdown versions of documentation pages are available by appending `.md` to page URLs; this page is available as [Markdown](https://docs.verifone.com/hardware-products/hardware/engage-devices/m4xx-series/m400/m400-quick-installation-guide.md).

# M400 Quick Installation Guide

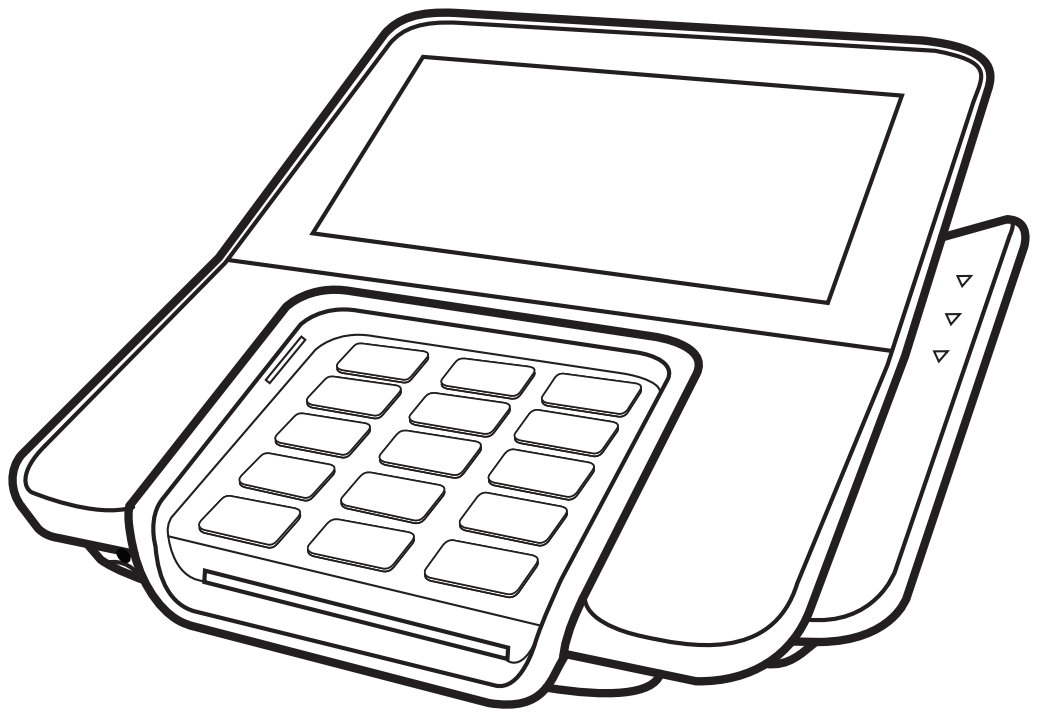
Follow these steps to unpack, connect and start using the M400 payment terminal.

Before you begin, confirm you have all devices, cables, and accessories listed below.

## What's in the Box

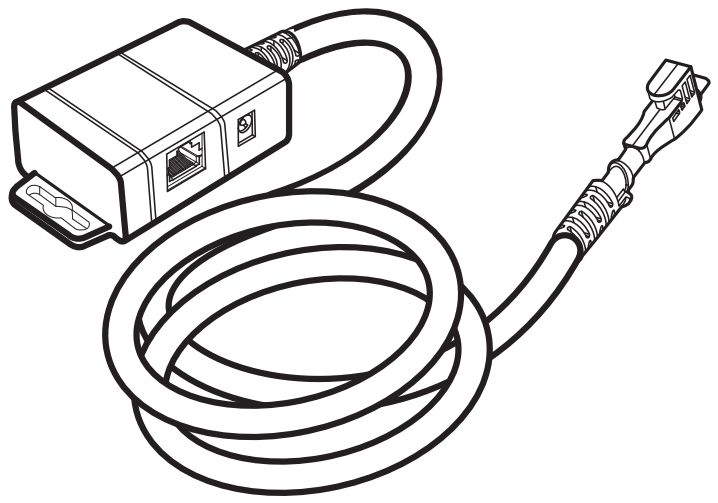
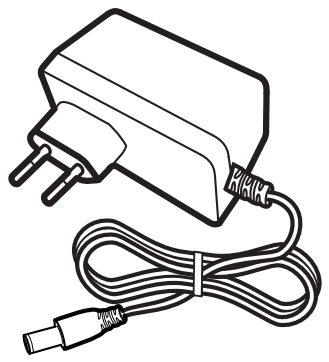
<table data-view="cards"><thead><tr><th></th><th></th><th data-hidden data-card-cover data-type="image">Cover image</th></tr></thead><tbody><tr><td><h3>M400 Terminal</h3></td><td>The payment terminal, with colour touchscreen, keypad and card reader.</td><td data-object-fit="contain"><a href="https://content.gitbook.com/content/kxOil1YNUno7kCEUA3XZ/blobs/itnWkr2wibfmTE1bgWGT/.gitbook/assets/box-m400-terminal.png">.gitbook/assets/box-m400-terminal.png</a></td></tr><tr><td><h3>Multiport Cable</h3></td><td>Terminal cable with a connection box carrying an Ethernet port and a DC power socket.</td><td data-object-fit="contain"><a href="https://content.gitbook.com/content/kxOil1YNUno7kCEUA3XZ/blobs/fKBPzCXDKffVlxNmu0e9/.gitbook/assets/box-multiport-cable.png">.gitbook/assets/box-multiport-cable.png</a></td></tr><tr><td><h3>Power Supply</h3></td><td>Mains power adapter with a DC barrel connector.</td><td data-object-fit="contain"><a href="https://content.gitbook.com/content/kxOil1YNUno7kCEUA3XZ/blobs/vDN39iyXl0Lu8kE9AToF/.gitbook/assets/box-power-supply.png">.gitbook/assets/box-power-supply.png</a></td></tr></tbody></table>

## Quick Setup Guide

{% stepper %}
{% step %}

### Remove the Cable Cover

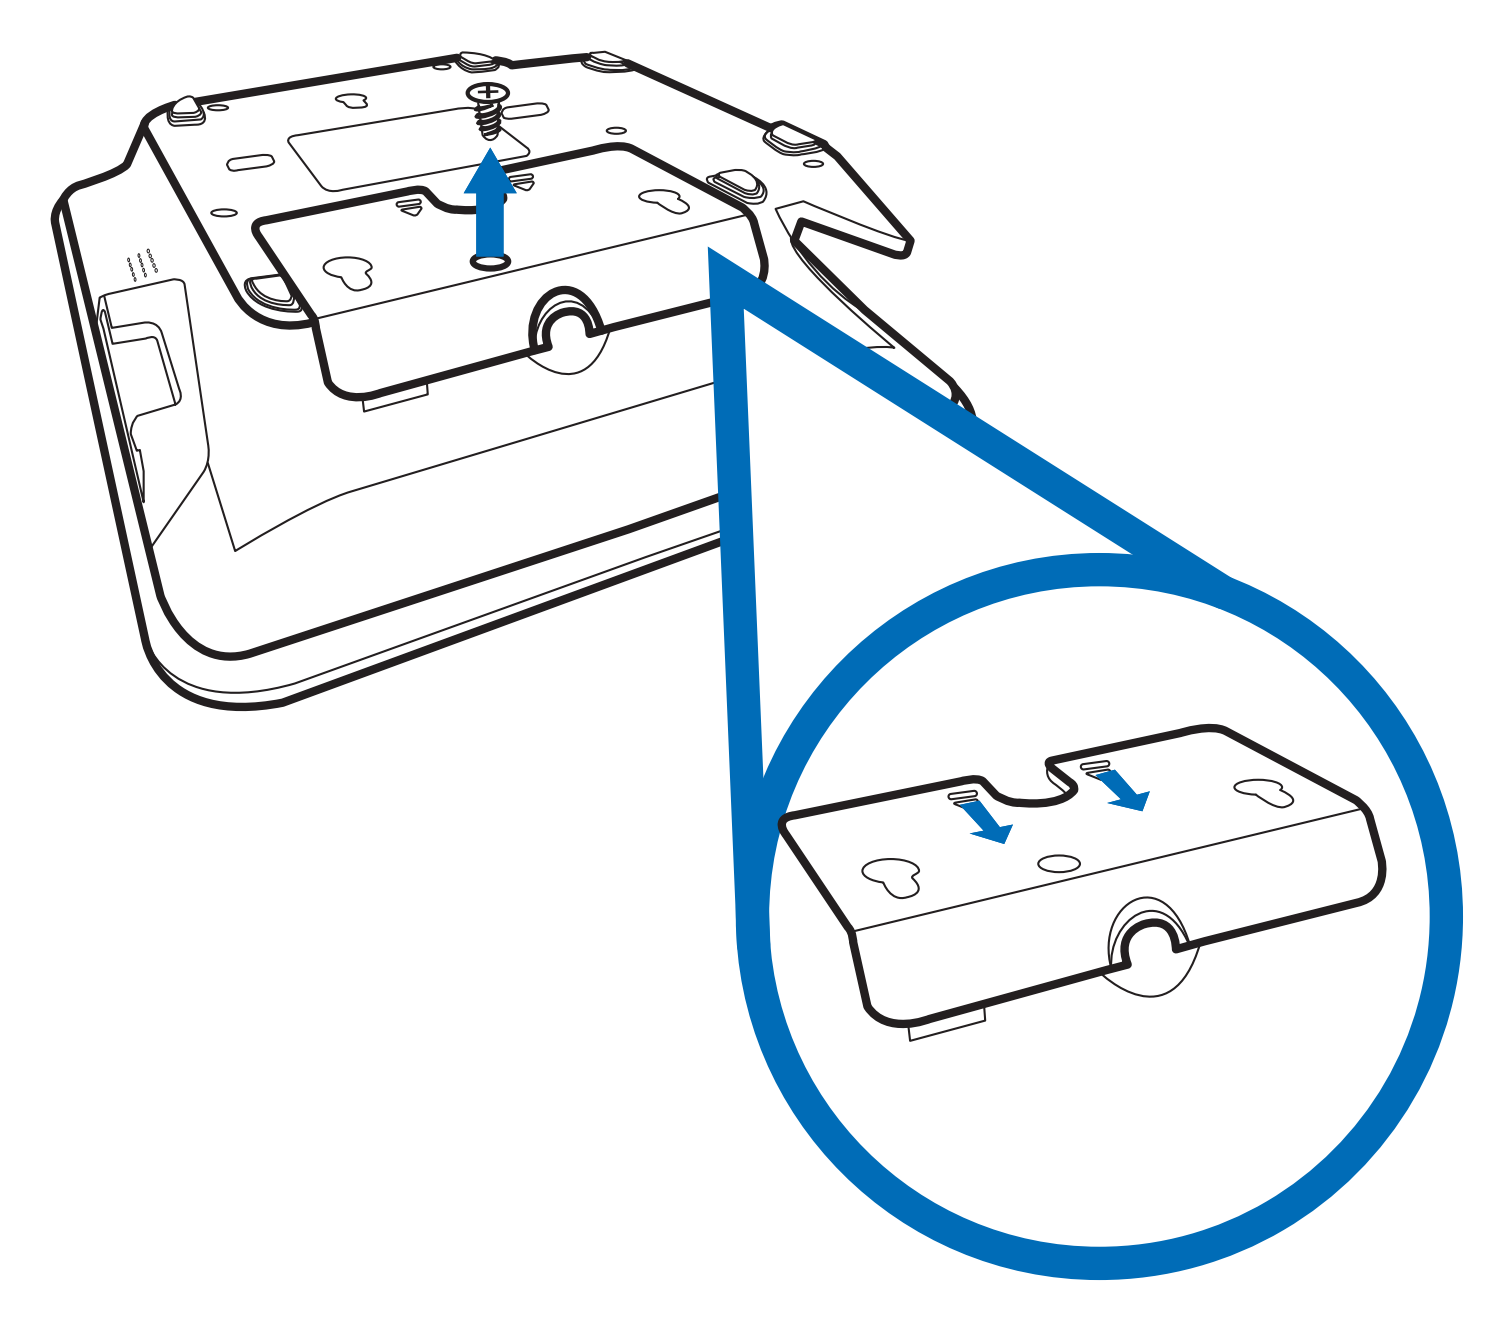
Turn the terminal face down, take out the cover screw, and unclip the cable cover from the two tabs on the underside.

<figure><img src="https://content.gitbook.com/content/kxOil1YNUno7kCEUA3XZ/blobs/2XlAZWGQNQ0ZUkGdXvmz/.gitbook/assets/step-1-cable-cover.png" alt="" width="375"><figcaption><p>Figure 1: Removing the cover screw, with the cover tabs shown enlarged.</p></figcaption></figure>
{% endstep %}

{% step %}

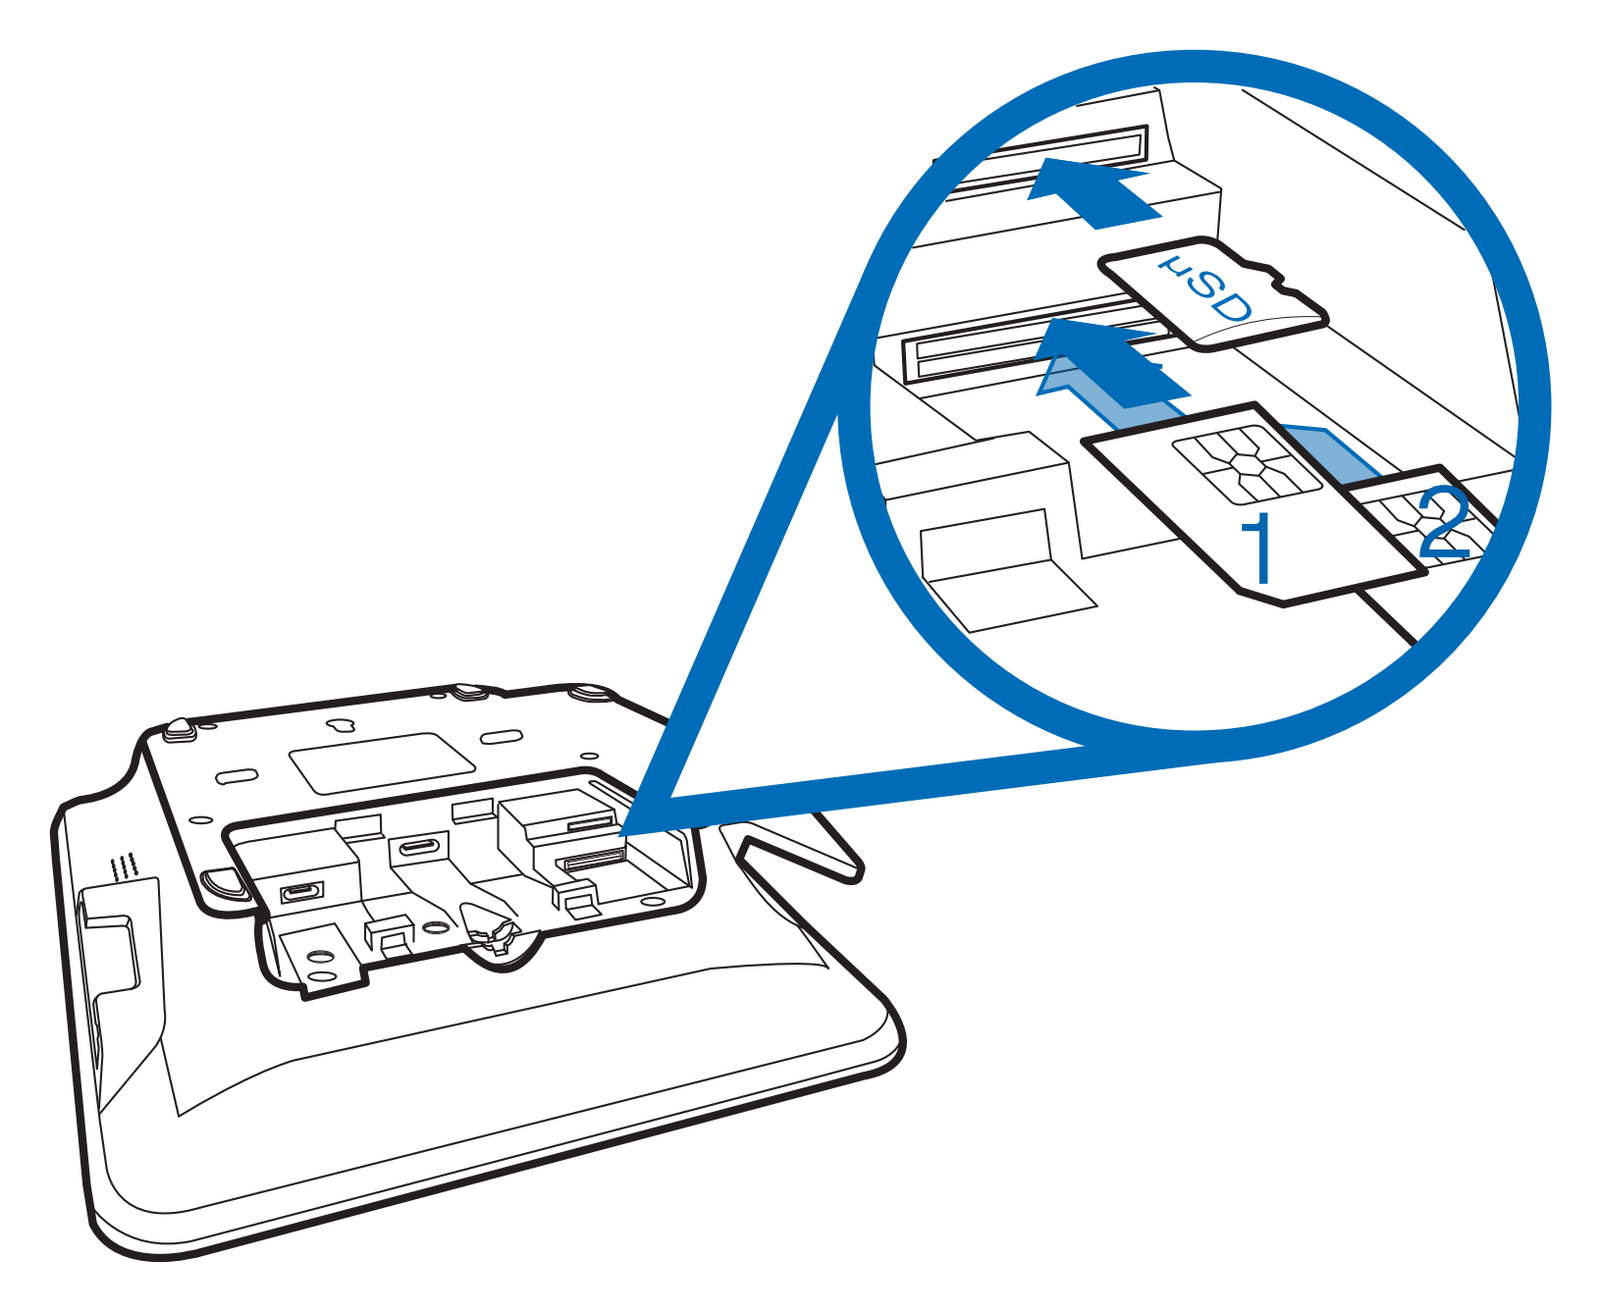
### Insert the SIM, SAM and microSD Cards

With the cover off, slide the cards into the slots in the compartment: the SIM and SAM cards into slots 1 and 2, and the microSD card into the µSD slot.

<figure><img src="https://content.gitbook.com/content/kxOil1YNUno7kCEUA3XZ/blobs/pqioTFxaktZecQNeifLq/.gitbook/assets/step-2-cards.png" alt="" width="375"><figcaption><p>Figure 2: Card slots 1, 2 and µSD, shown enlarged.</p></figcaption></figure>
{% endstep %}

{% step %}

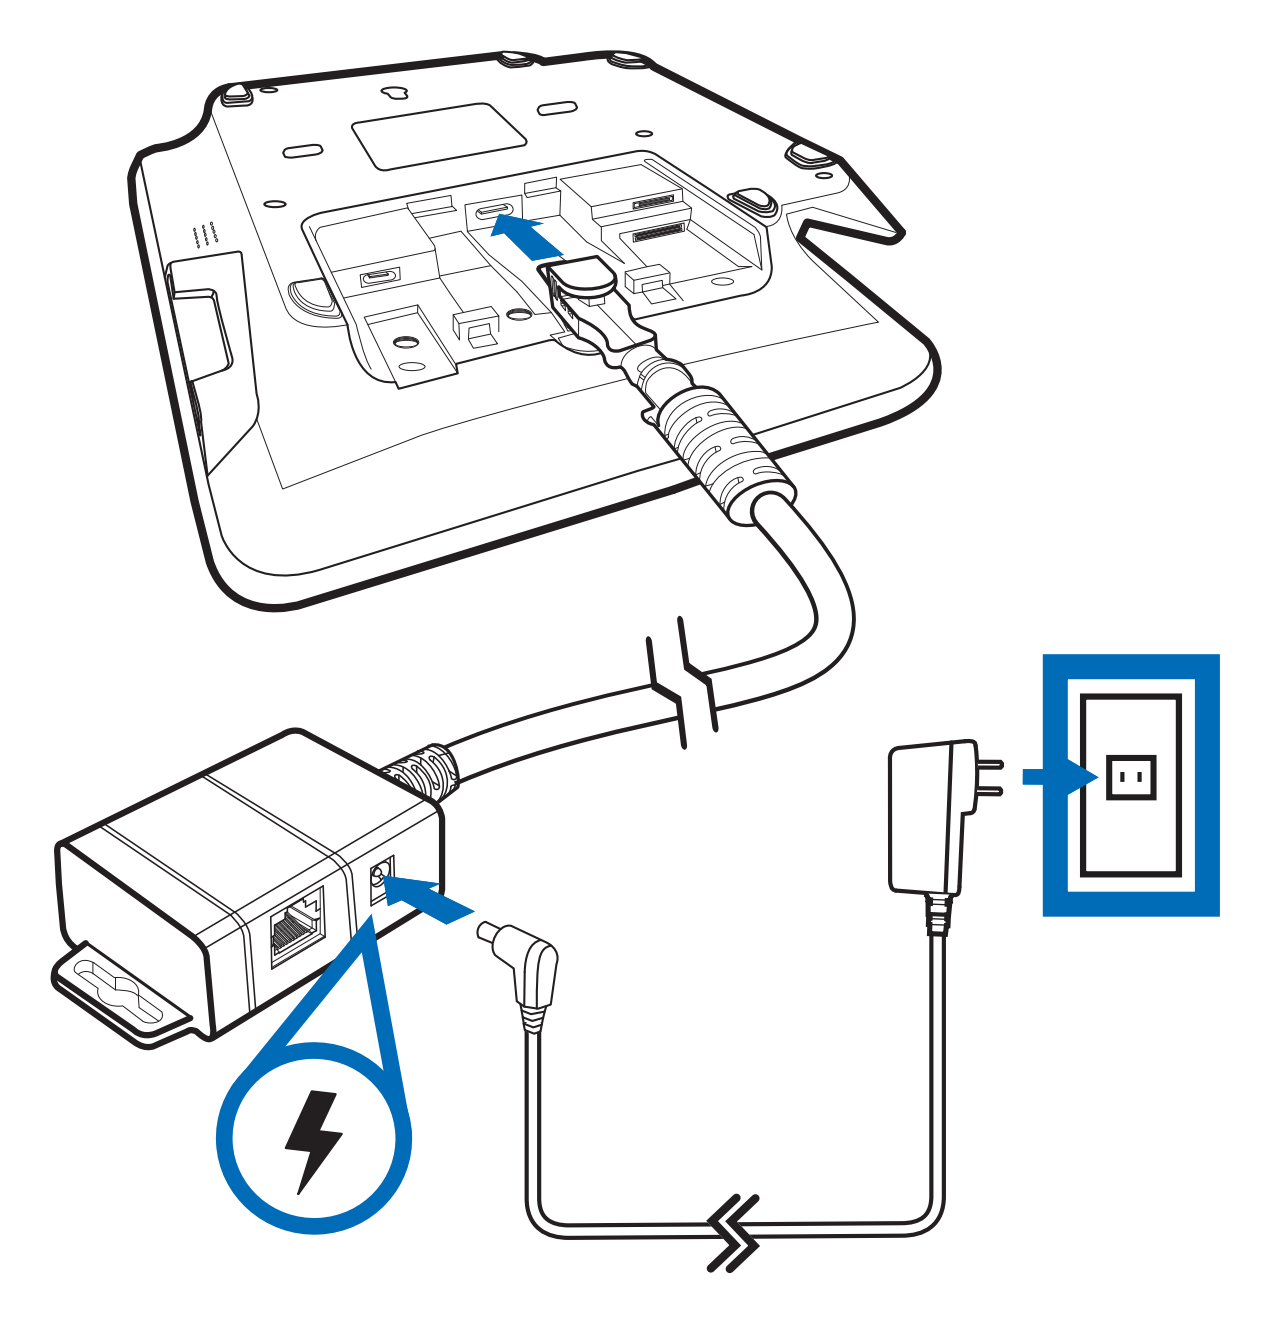
### Connect the Cable and Power

Plug the multiport cable into the connector on the underside of the terminal, connect the power supply to the DC socket on the connection box, then plug the power supply into a mains outlet.

<figure><img src="https://content.gitbook.com/content/kxOil1YNUno7kCEUA3XZ/blobs/FRwHotiRUAyKOgzbCVQg/.gitbook/assets/step-3-power.png" alt="" width="375"><figcaption><p>Figure 3: Multiport cable to the terminal, power supply to the connection box and the mains outlet.</p></figcaption></figure>
{% endstep %}

{% step %}

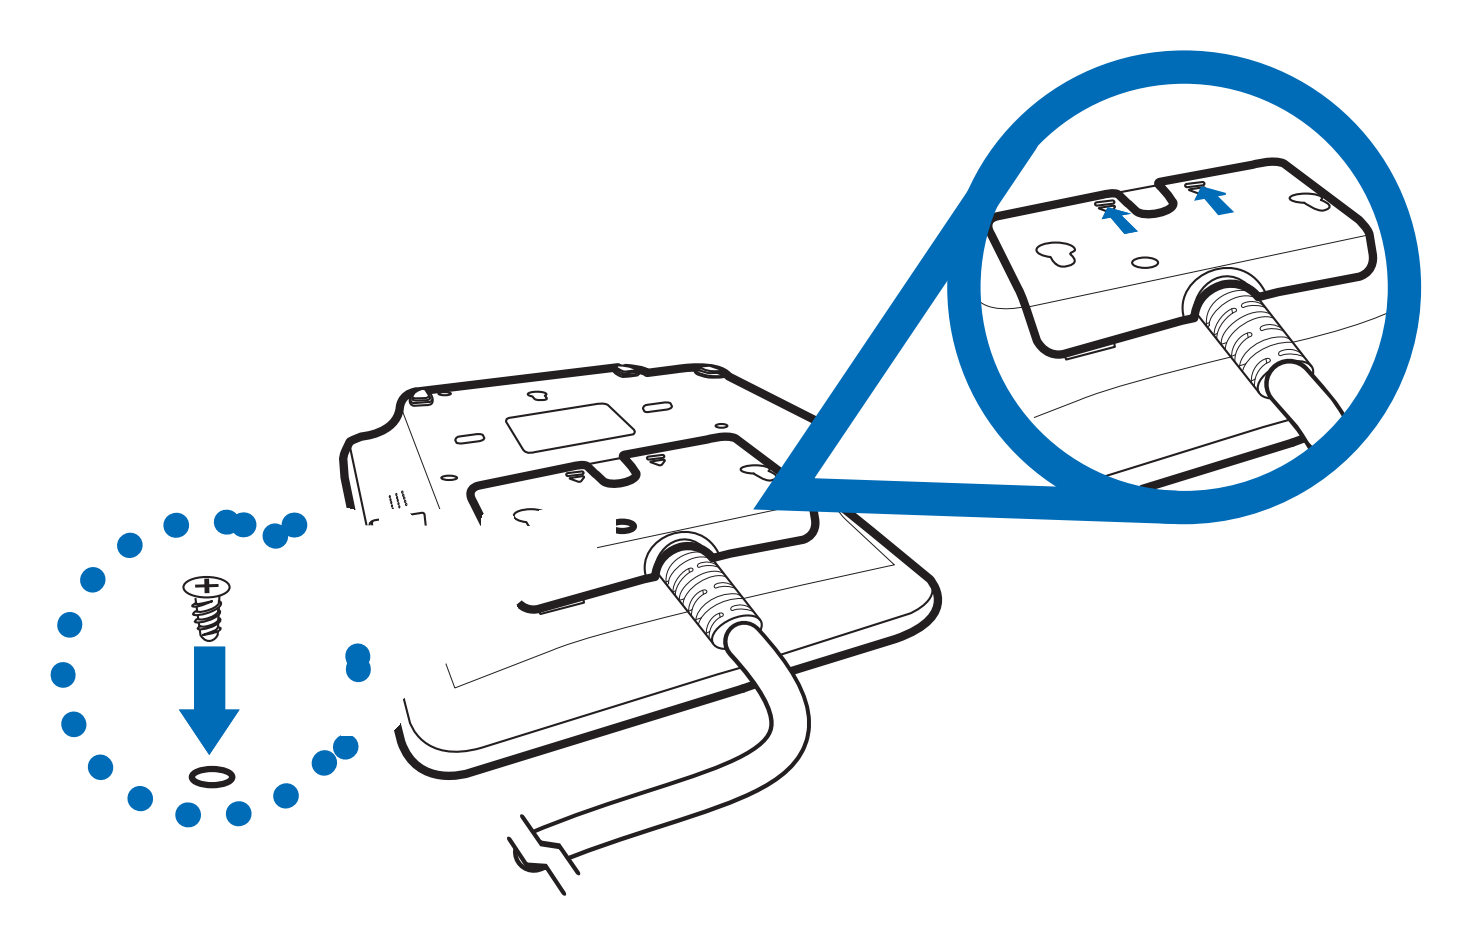
### Refit the Cable Cover

Route the cable through the channel in the base, clip the cover back onto its tabs, and secure it with the screw.

<figure><img src="https://content.gitbook.com/content/kxOil1YNUno7kCEUA3XZ/blobs/6I8FVcf9S7uzWfDFUVlB/.gitbook/assets/step-4-refit-cover.png" alt="" width="375"><figcaption><p>Figure 4: Refitting the cover over the routed cable and replacing the screw.</p></figcaption></figure>
{% endstep %}

{% step %}

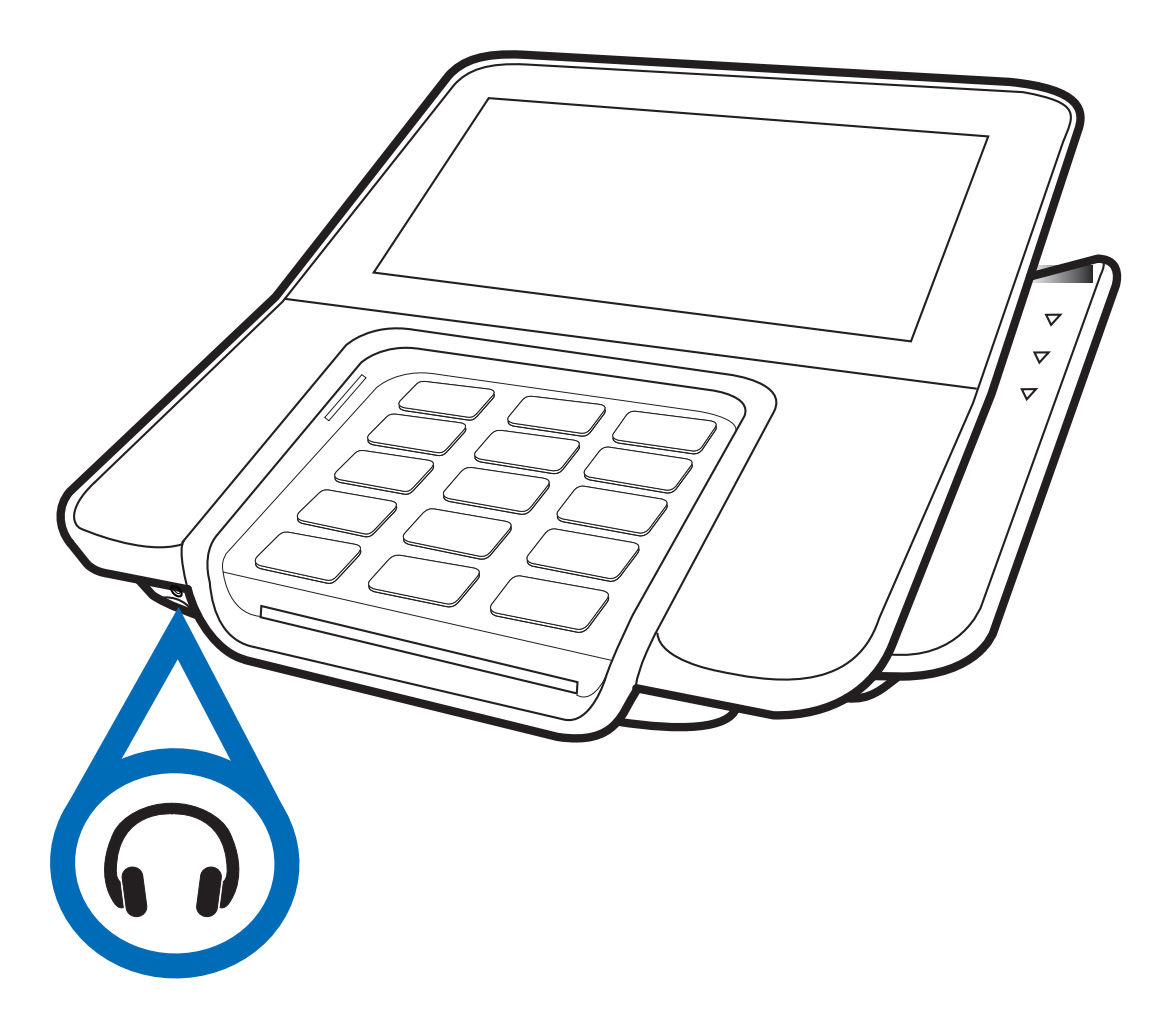
### Locate the Headset Jack

The headset jack is on the front left edge of the terminal. Plug an audio headset in here.

<figure><img src="https://content.gitbook.com/content/kxOil1YNUno7kCEUA3XZ/blobs/vqRiodYpWk1U0Hdwht3M/.gitbook/assets/step-5-headset.png" alt="" width="375"><figcaption><p>Figure 5: Headset jack on the front left edge.</p></figcaption></figure>
{% endstep %}

{% step %}

### Take a Payment

{% stepper %}
{% step %}

#### Swipe a magnetic stripe card

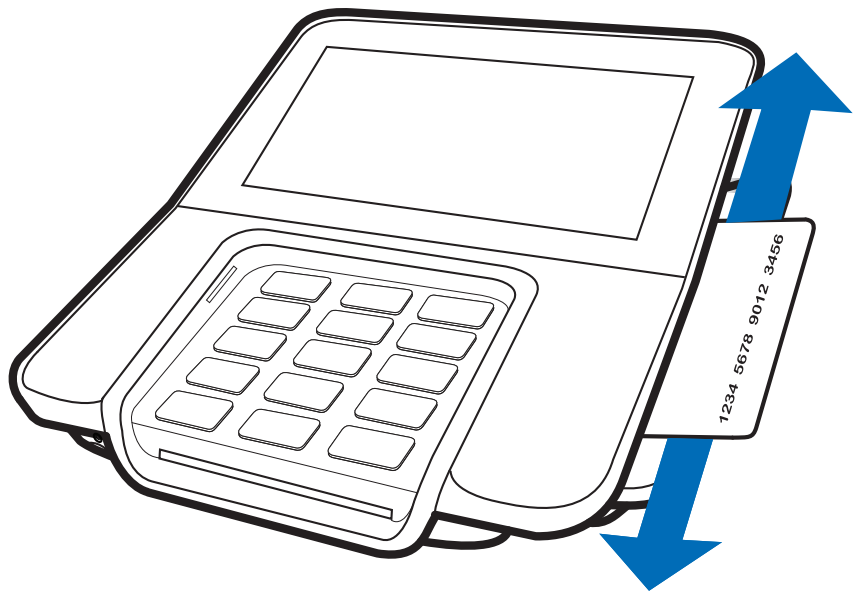
Swipe the card through the reader on the right-hand side of the terminal.

<figure><img src="https://content.gitbook.com/content/kxOil1YNUno7kCEUA3XZ/blobs/S6fgidDZt8O9ZWGRoVgW/.gitbook/assets/step-6-1-swipe.png" alt="" width="375"><figcaption><p>Figure 6: Swiping a card through the side reader.</p></figcaption></figure>
{% endstep %}

{% step %}

#### Insert a chip card

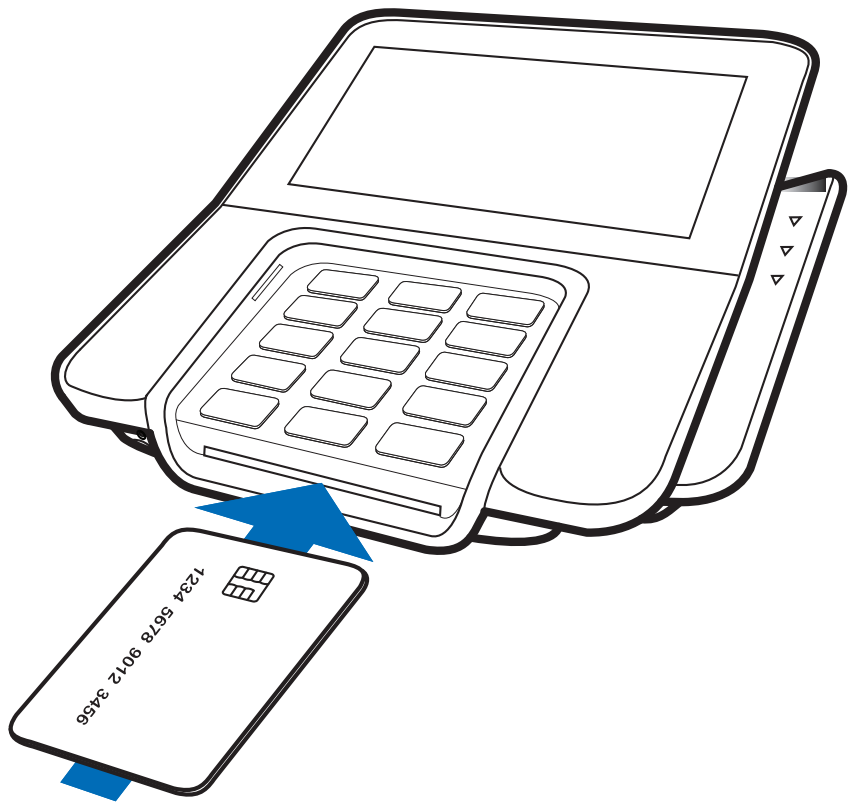
Insert the card chip first, chip facing up, into the slot below the keypad.

<figure><img src="https://content.gitbook.com/content/kxOil1YNUno7kCEUA3XZ/blobs/IG87a4cKXxMNmd6ySjoW/.gitbook/assets/step-6-2-insert.png" alt="" width="375"><figcaption><p>Figure 7: Inserting a chip card into the front slot.</p></figcaption></figure>
{% endstep %}

{% step %}

#### Tap a contactless card

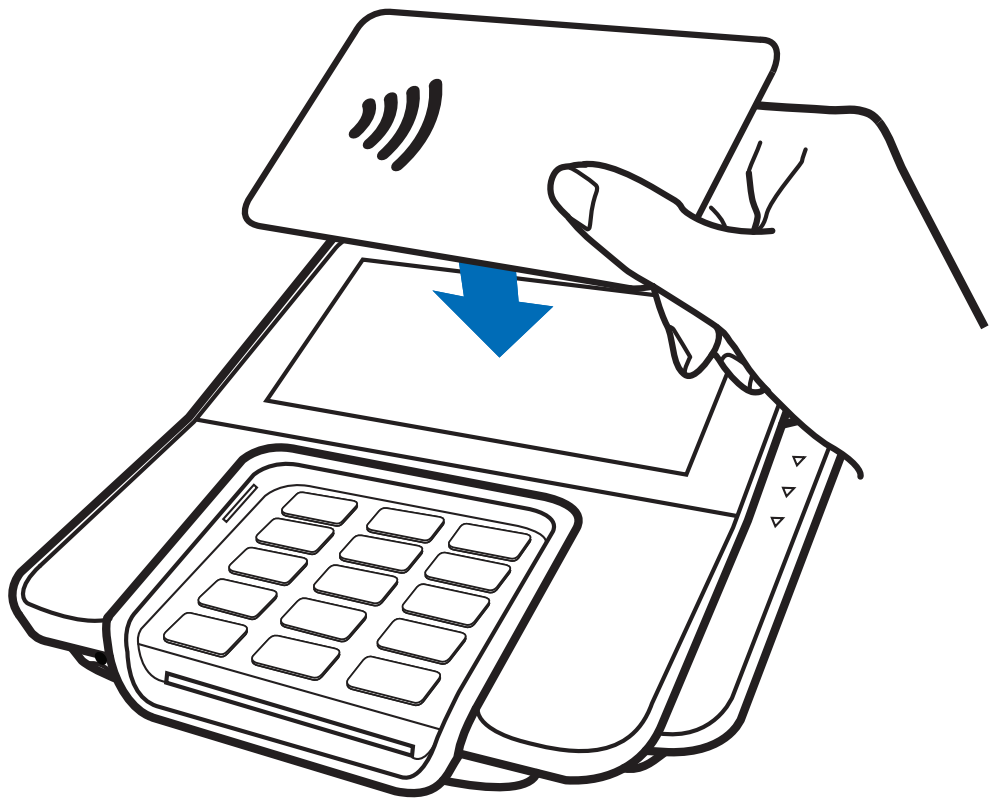
Hold the contactless card or device over the display.

<figure><img src="https://content.gitbook.com/content/kxOil1YNUno7kCEUA3XZ/blobs/cJF7Ud791MHOYXulF4Gf/.gitbook/assets/step-6-3-tap.png" alt="" width="375"><figcaption><p>Figure 8: Tapping a contactless card over the display.</p></figcaption></figure>
{% endstep %}
{% endstepper %}
{% endstep %}

{% step %}

### Connect by Bluetooth

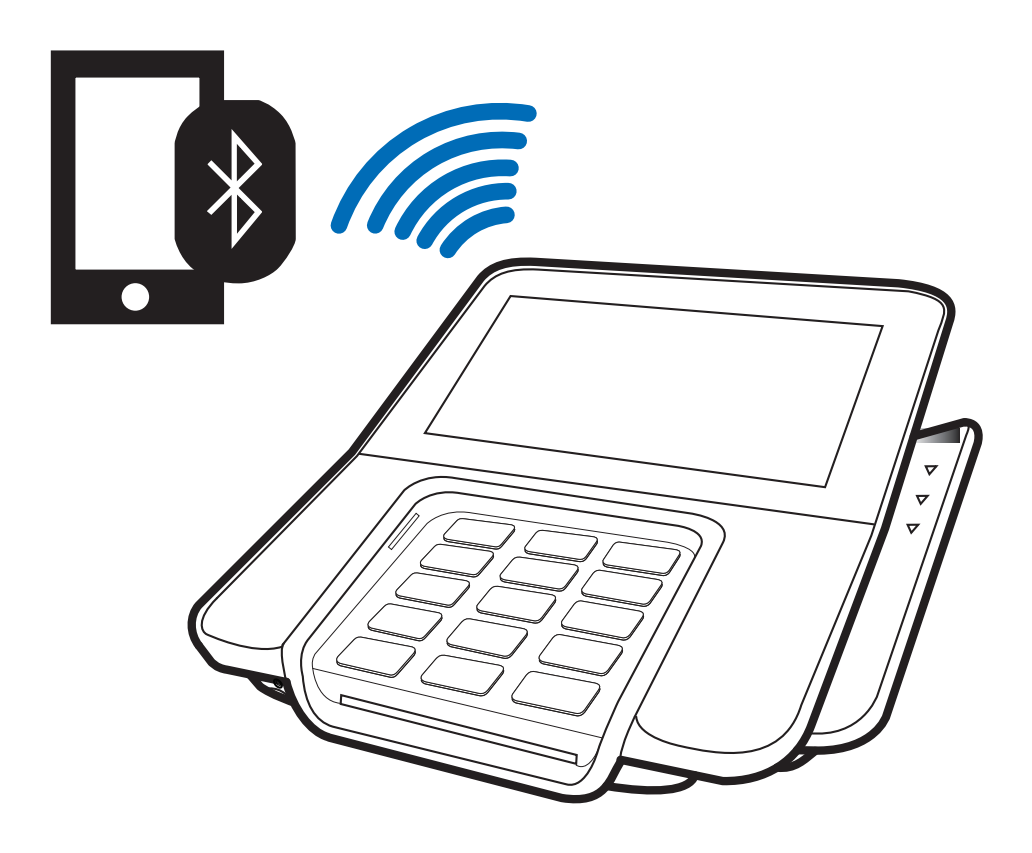
Pair the terminal with a Bluetooth host device.

<figure><img src="https://content.gitbook.com/content/kxOil1YNUno7kCEUA3XZ/blobs/Sucn2Bm1sVhYaxBpNtmg/.gitbook/assets/step-7-bluetooth.png" alt="" width="375"><figcaption><p>Figure 9: Bluetooth connection between a mobile device and the terminal.</p></figcaption></figure>
{% endstep %}

{% step %}

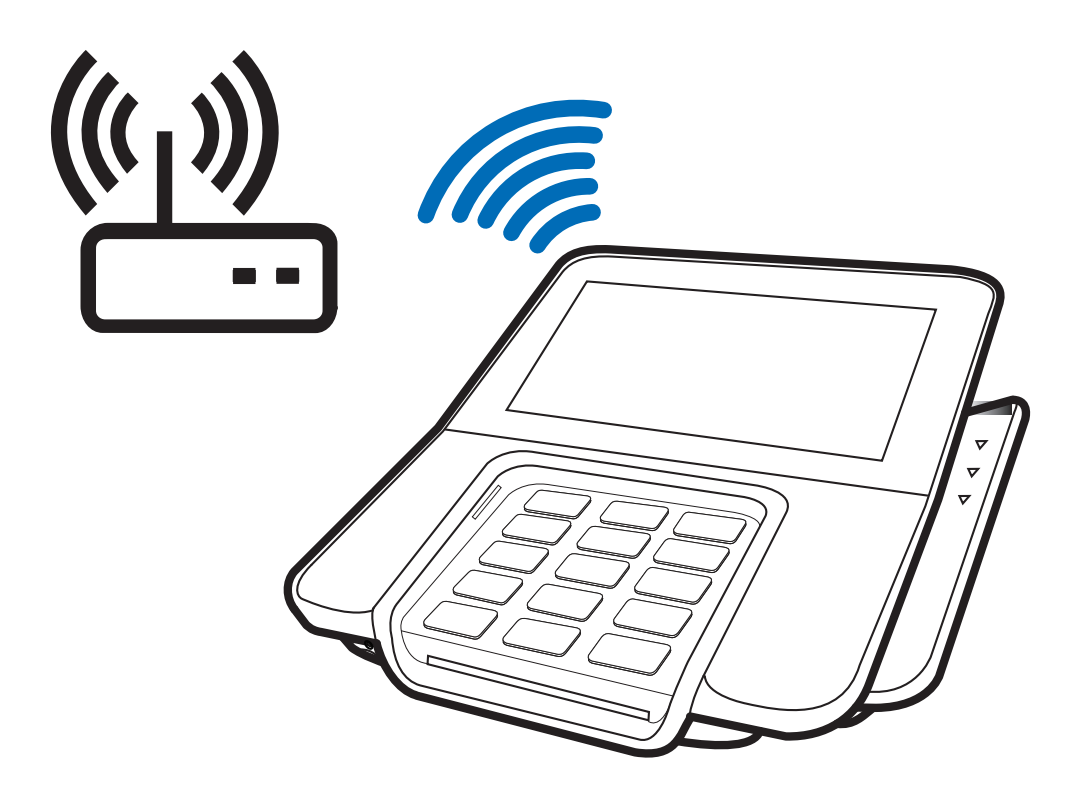
### Connect to Wi-Fi

Connect the terminal to your wireless network.

<figure><img src="https://content.gitbook.com/content/kxOil1YNUno7kCEUA3XZ/blobs/NbXgoo1koo9XeTJWs0AM/.gitbook/assets/step-8-wifi.png" alt="" width="375"><figcaption><p>Figure 10: Wi-Fi connection between the router and the terminal.</p></figcaption></figure>
{% endstep %}

{% step %}

### Fit the Stylus Holder

{% stepper %}
{% step %}

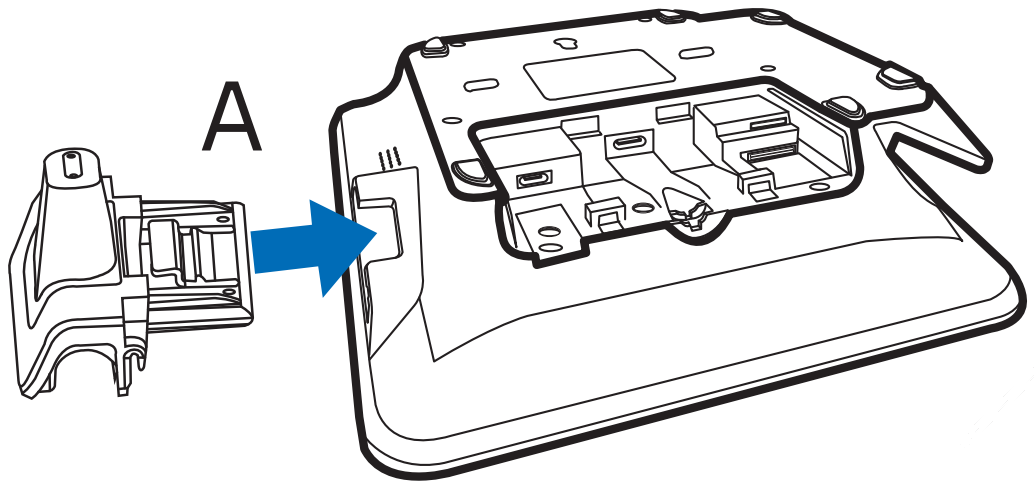
#### Attach the holder (A)

With the terminal face down, slide the stylus holder onto the left edge until it clips into place.

<figure><img src="https://content.gitbook.com/content/kxOil1YNUno7kCEUA3XZ/blobs/GBhcOJ9fDlb1lbnsA79m/.gitbook/assets/step-9-a-fit-holder.png" alt="" width="563"><figcaption><p>Figure 11: Sliding the holder onto the left edge of the terminal.</p></figcaption></figure>
{% endstep %}

{% step %}

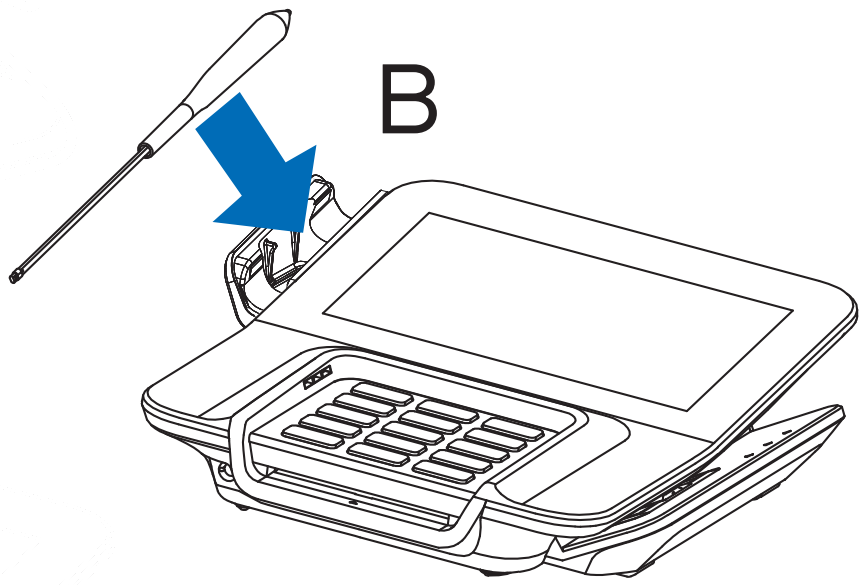
#### Insert the stylus (B)

Turn the terminal upright and push the stylus down into the holder.

<figure><img src="https://content.gitbook.com/content/kxOil1YNUno7kCEUA3XZ/blobs/sPWNh33YZCqW958mkPS1/.gitbook/assets/step-9-b-insert-stylus.png" alt="" width="563"><figcaption><p>Figure 12: Pushing the stylus down into the holder.</p></figcaption></figure>
{% endstep %}

{% step %}

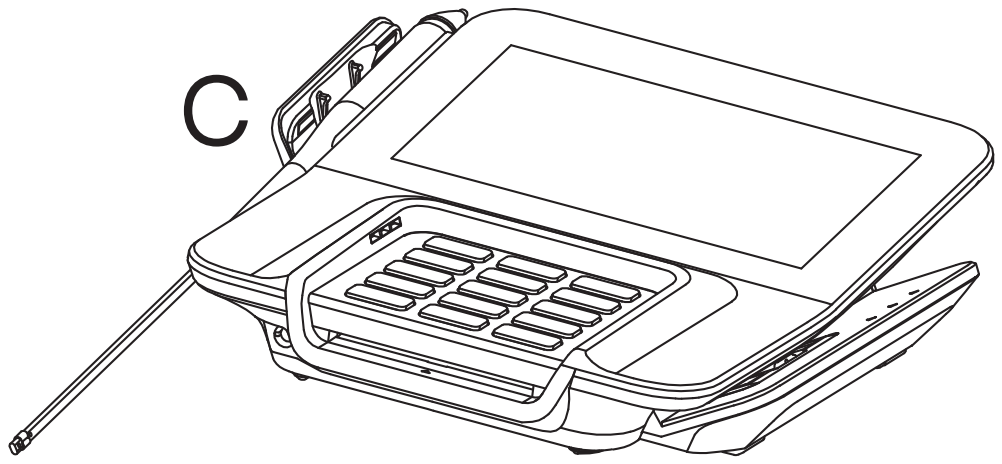
#### Stylus in place (C)

The stylus rests in the holder along the left side of the terminal.

<figure><img src="https://content.gitbook.com/content/kxOil1YNUno7kCEUA3XZ/blobs/kfTlySwkUQe1F0PGyyl2/.gitbook/assets/step-9-c-stylus-stored.png" alt="" width="563"><figcaption><p>Figure 13: Stylus stored in the holder.</p></figcaption></figure>
{% endstep %}
{% endstepper %}
{% endstep %}

{% step %}

### Remove the Stylus Holder

{% stepper %}
{% step %}

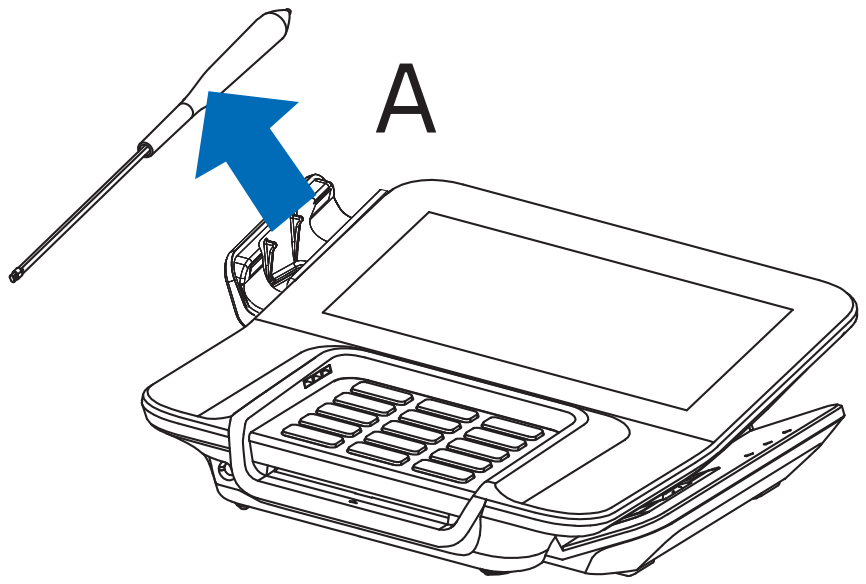
#### Lift out the stylus (A)

Pull the stylus up and out of the holder.

<figure><img src="https://content.gitbook.com/content/kxOil1YNUno7kCEUA3XZ/blobs/zIPZug6waKOFWeF81dHg/.gitbook/assets/step-10-a-remove-stylus.png" alt="" width="563"><figcaption><p>Figure 14: Lifting the stylus out of the holder.</p></figcaption></figure>
{% endstep %}

{% step %}

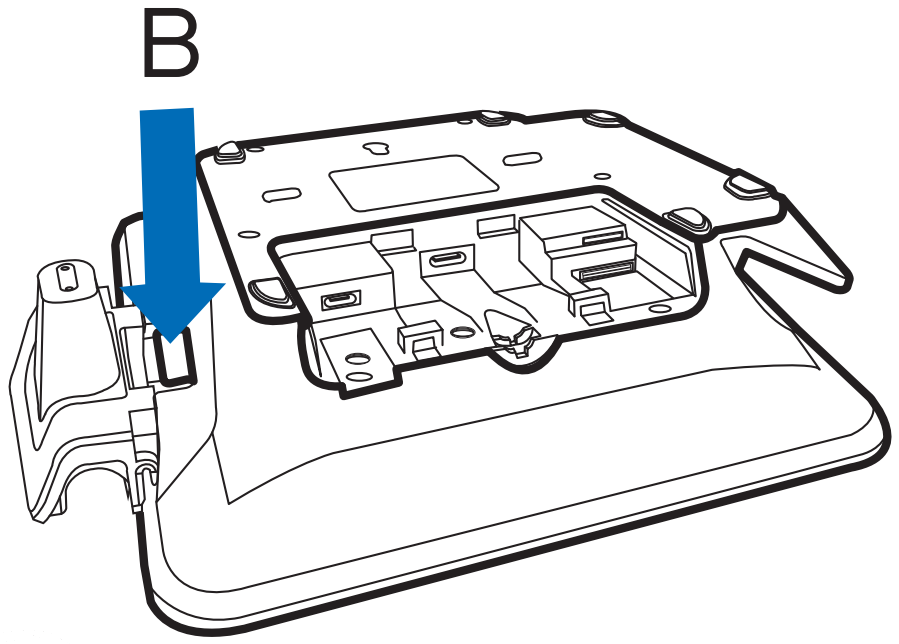
#### Release the holder (B)

Turn the terminal face down and press down on the holder where it meets the terminal edge.

<figure><img src="https://content.gitbook.com/content/kxOil1YNUno7kCEUA3XZ/blobs/laPEXSnF8fXn0D1Qni9F/.gitbook/assets/step-10-b-release-holder.png" alt=""><figcaption><p>Figure 15: Pressing down to release the holder.</p></figcaption></figure>
{% endstep %}

{% step %}

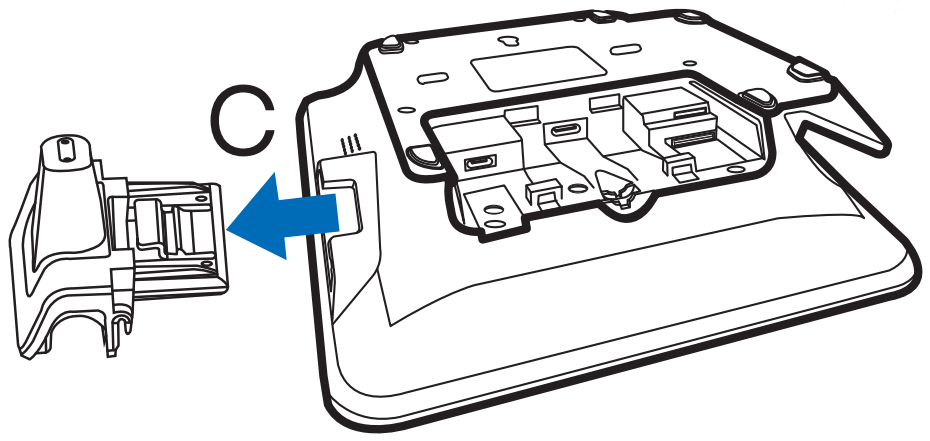
#### Slide the holder off (C)

Slide the holder away from the terminal to detach it.

<figure><img src="https://content.gitbook.com/content/kxOil1YNUno7kCEUA3XZ/blobs/0qCHdRvro85jYp2uHsmW/.gitbook/assets/step-10-c-detach-holder.png" alt=""><figcaption><p>Figure 16: Sliding the holder off the terminal.</p></figcaption></figure>
{% endstep %}
{% endstepper %}
{% endstep %}
{% endstepper %}

## Full Installation Guide

For full device setup details, product information, and troubleshooting steps, refer to the [M400 Installation Guide](/hardware-products/hardware/engage-devices/m4xx-series/m400/m400-installation-guide.md) (DOC445-003-EN).


---

# Agent Instructions
This documentation is published with GitBook. GitBook is the documentation platform designed so that both humans and AI agents can read, navigate, and reason over technical content effectively. Learn more at gitbook.com.

## Querying This Documentation
If you need additional information that is not directly available in this page, you can query the documentation dynamically by asking a question.

Perform an HTTP GET request on the current page URL with the `ask` query parameter, and the optional `goal` query parameter:

```
GET https://docs.verifone.com/hardware-products/hardware/engage-devices/m4xx-series/m400/m400-quick-installation-guide.md?ask=<question>&goal=<endgoal>
```

`ask` is the immediate question: it should be specific, self-contained, and written in natural language.
`goal` is optional and describes the broader end goal you are ultimately trying to accomplish on behalf of the user. GitBook uses it to tailor the answer towards what is most useful for that goal.

The response will contain a direct answer to the question and relevant excerpts and sources from the documentation.

Use this mechanism when the answer is not explicitly present in the current page, you need clarification or additional context, or you want to retrieve related documentation sections.